ALM
Installation
Refer to the ALM plugin installation page for details about installation and configuration.
Plugin Usage
Step name
The field “Step Name” of the ALM Test Plan is used to described your steps. It is used in both the test execution reports in step and in the Test Runs reports in ALM. It is therefore a good practice to use short and expressive step names.
Description field
The field “Description” of the ALM Test Plan is used to specify the flow of your Test Plan. For the simplest Test Plans it is a simple sequence of keywords with key-values as parameters. More complex Test Plans make use of the step Controls in Plain text syntax and are documented here.
You could for example, call the keyword “Keyword1” with 2 parameters using below syntax :
| Step Name | Description | Expected Result |
|---|---|---|
| Step 1 | Keyword1 Parameter1 = “Value1” Parameter2 = “Value2” |
TestCase Example
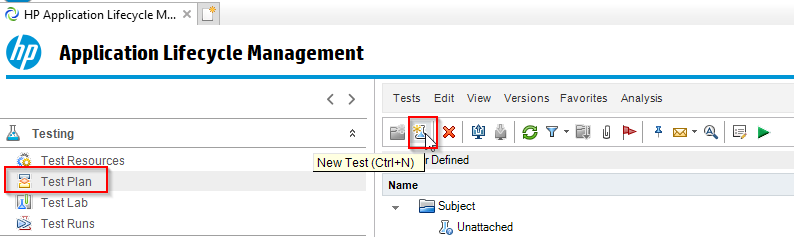
To create a simple test case, open ALM and navigate to the Test Plan view then click on the “New Test” icon :
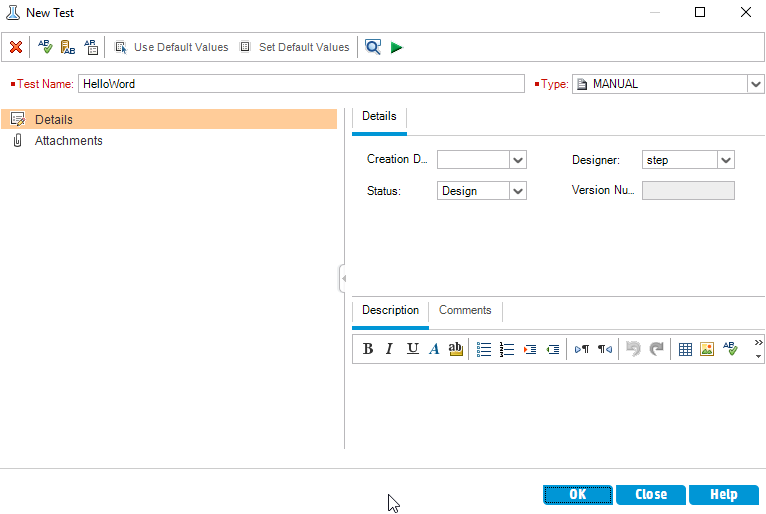
Give your plan a name then click to the “OK” button :
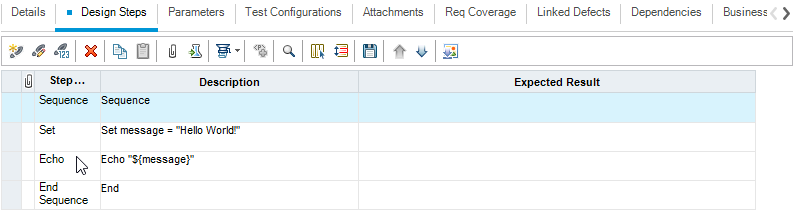
You can now add some execution steps to your test using the right panel. Let’s create a simple test which contains a sequence with a variable assignment and an echo :
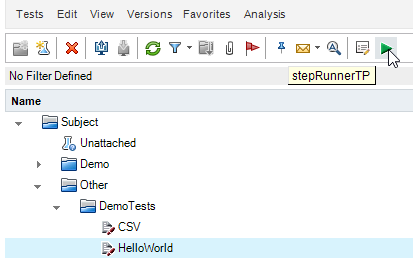
Once you have checked-in your new test, click on the execution button : it will be executed in step as a test case (default behavior) :
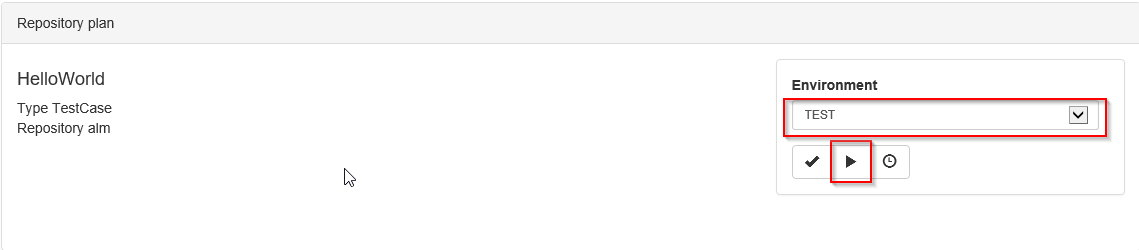
Choose the desired environment where to execute the test than click on execute :
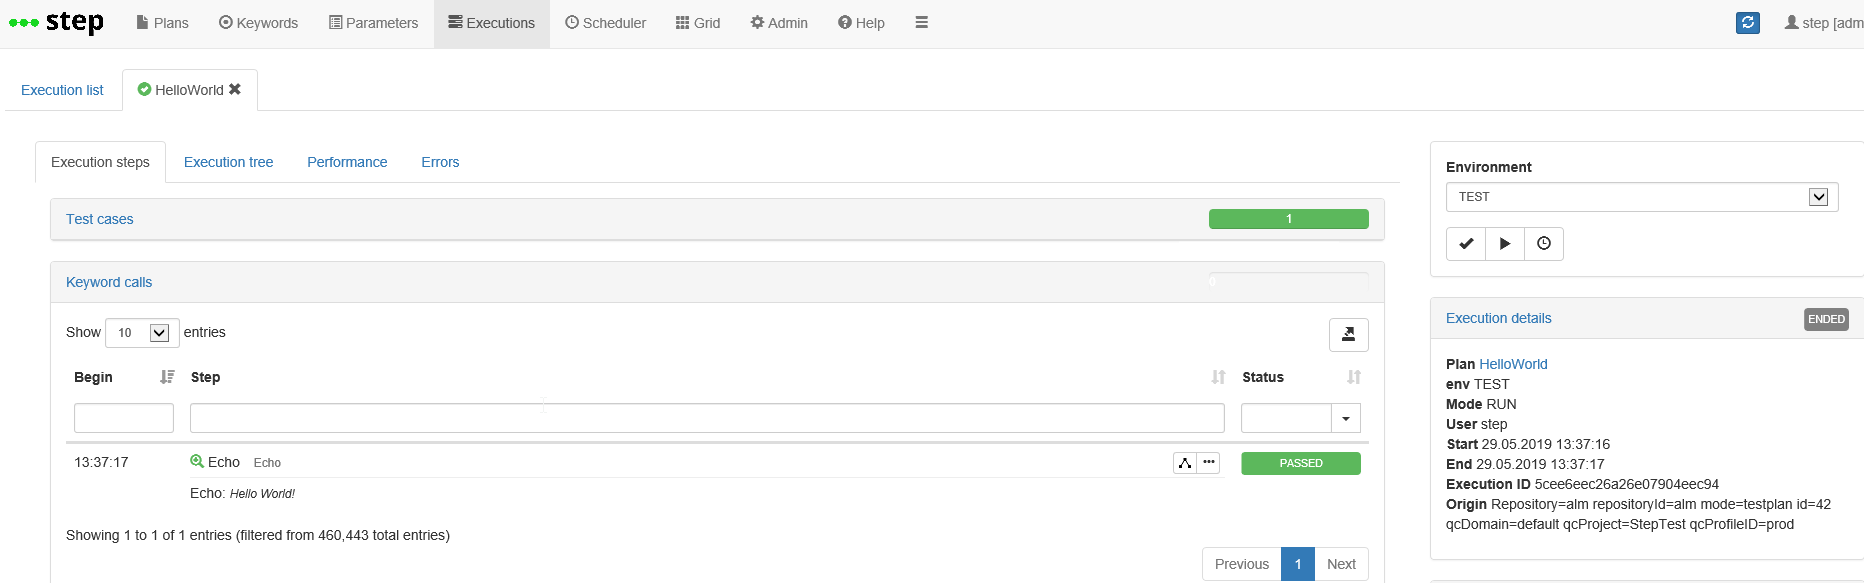
You are directed to the step execution screen where you can view your test plan results :
TestSet Example
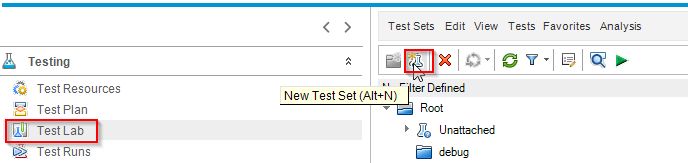
To execute several test in parallel, you can use the TestSet functionality via the ALM Test Lab. For this, navigate to the Test Lab view and click on the “New Test” icon :
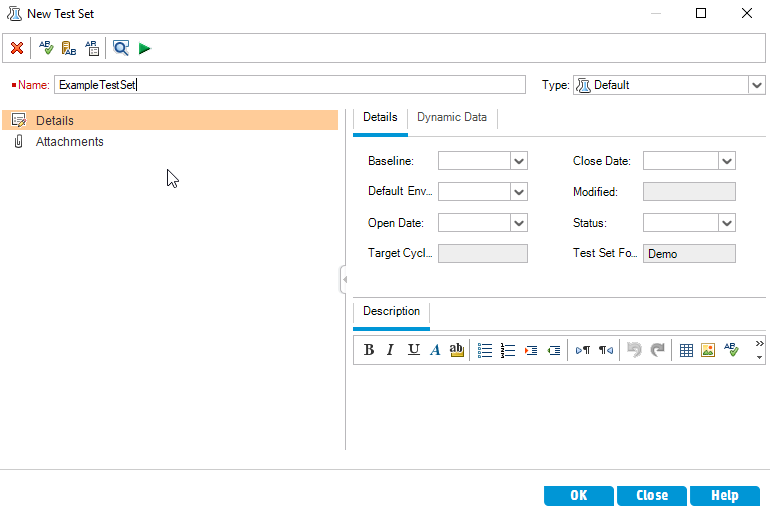
Give your test set a name then click to the “OK” button :
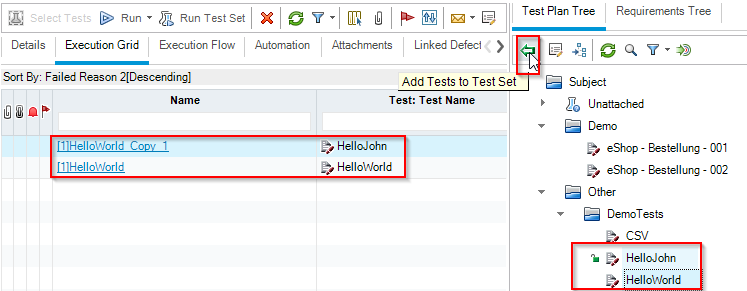
You can now add some test plans to your test set using the right panel. Select the test plans you want to add then click on the “Add Tests to Test Set” button :
Once you have checked-in your new test set, click on the execution button : it will be executed in step as a test set (default behaviour) :
Choose the desired environment where to execute the test set than click on execute :

You are directed to the step execution screen where you can view your test set results :

In addition, the test case execution results are reported in ALM : you can view them in the Test Lab after having clicked on your Test Set, under the tab “Execution Grid” :

Expected Result field
The Expected Result field can be used to express checks after a Keyword execution.
The syntax is the following :
keywordOutputValue operator "expectedValue"Below the field description :
- keywordOutputValue = the name of the output value of the keyword to be checked
- operator = The operator to be used to perform the check. The following operators are supported:
- = : equality check
- ~ : regular expression check
- contains : asserts true if the specified output attribute contains the expected value
- beginsWith : asserts true if the specified output attribute value begins with the expected value
- endsWith : asserts true if the specified output attribute value ends with the expected value
- expectedValue the expected value
Example
| Step Name | Description | Expected Result |
|---|---|---|
| Step 1 | Keyword1 Parameter1 = “Value1” Parameter2 = “Value2” |
OutputParameter1 = “MyExpectedValue” OutputParameter2 beginsWith = “MyExpected” |
Groovy macros
It is possible to define new Groovy macros that can be called in your test description. The related documentation is located here.