Agent installation
This page contains information on installing and configuring step Agents.
Installation
Java agent
step requires at least Java 8 installed in order to run. Depending on your platform, make sure to install at least Java JDK 8 on the machine(s) running step component(s).
The latest version of the Community Edition of the step Agent can be downloaded from our Github repository at : step.
The latest version of the Enterprise Edition of the step Agent can be downloaded from our FTP by enterprise customers at : step Enterprise (credentials are provided upon requests)
In both cases, extract the step Agent archive using any unarchiver tool that support the zip format.
If you are only interested in step Java Agent installation, you can now jump to the Folder Structure Section.
.NET agent
The .NET version of the step Agent is only available with the Enterprise Edition of step. Therefore, the step .NET Agent can be downloaded from our FTP by enterprise customers at : step Enterprise (credentials are provided upon requests)
To install the agent, extract the step .NET Agent archive using any unarchiver tool that support the zip format.
In addition, you need to execute the following command line as Administrator to allow the step to listen to the port 8098
netsh http add urlacl url=http://+:8098/ sddl=D:(A;;GX;;;S-1-1-0)
If you are only interested in step .NET Agent installation, you can now jump to the Folder Structure Section.
NodeJS agent
To install the Node.js agent, you have to run the following npm command:
npm install -g step-node-agent
Please note that this command have to be executed with the user that will run the agent.
If your machine do not have network connectivity, you can download the package with the embedded dependencies from our ftp and install the agent with
npm install -g .\step-node-agent-3.10.0.tgz
If you are only interested in step NodeJS Agent installation, you can now jump to the Folder Structure Section.
Folder Structure
Below the description of the Agent structure folder :
agent/
├── bin : contains startup scripts
├── conf : contains configurations files
├── ext : default location for external software binaries and libraries
├── lib : contains dependencies libraries
└── log : default location for the log files
Basic Configuration
Configuration files can be found under the agent/conf folder and contains the following :
conf/
├── AgentConf.json
The only configuration file that needs to be tuned is AgentConf.json.
The main parameter to be updated in order to start the Agent is listed below :
- “gridHost”: “<url_to_access_controller_grid>”,
For example :
- “gridHost”:“http://controller:8081” -> Means that the Agent will try to connect to the port 8081 of the host called controller
NodeJS Only
The NodeJS step agent requires an extra parameter to set into its AgentConf.json file in order to tell the Controller the location of the keyword download path :
- “filemanagerPath”:"C:/tmp/"
Advanced Configuration
Capacity
You can also define the agent token capacity according to the resource allowed to each agent by setting up the capacity value :
- “capacity”: <token_number>
Agent token are responsible for the execution of Keywords. The agent token capacity defines the number of Agent tokens that the Agent will emit to the Controller GRID. The capacity defines the maximal number of parallel Keyword executions on the Agent.
For example :
- “capacity”:200 -> Means that maximum 200 keyword executions can run in parallel on this agent
Agent Url
You can override the URL that the Controller will use in order to communicate with the agent by setting the “agentUrl” property in the AgentConf.json file (this could be useful is the agent hostname cannot be resolved from the Controller host)
- “agentUrl”: <agentUrl>
This URL can be either a hostname or an IP address, for examples :
- “agentUrl”: “https://myAgentHost:7000”
- “agentUrl”: “http://192.168.10.50:8888”
Attributes
It is possible to define custom Agents attributes by setting them into the AgentConf.json file. This helps to categorize the step Agents according to your workload execution needs.
For example, we could define a pool of “Windows” Agents by setting an “OS” attribute like below :
"tokenGroups":[
{"capacity":1,
"tokenConf":{
 "attributes":{"OS" : "Windows"},
 "properties":{}}
}
],
On that example, the OS attribute can be used to route the workload on specific machines hosting this agent, enabling the ability to choose where to run test plans (see this link)
Configuration placeholders (advanced)
Placeholders can be used in AgentConf.json to define dynamic values that have to be set at startup outside the configuration file.
For instance, you might want to set the gridHost at startup. You could achieve this using a placeholder like this in your AgentConf.json:
- “gridHost”:"${myGridHost}",
and set the variable myGridHost in the startup script startAgent.bat(sh|command):
“%JAVA_PATH%java.exe” %JAVA_OPTS% -cp “..\lib*;” step.controller.ControllerServer -config=../conf/step.properties -myGridHost=http://mygridhost.net:8081
Startup
Startup scripts can be found under agent/bin and contains the following :
bin
├── logback.xml
├── startAgent.bat
├── startAgent.command
└── startAgent.sh
Depending on your platform, they are various ways to start the Agent :
- Windows: execute startAgent.bat
- Linux: make startAgent.sh executable and execute it
- Mac OS: make startAgent.command executable and execute it.
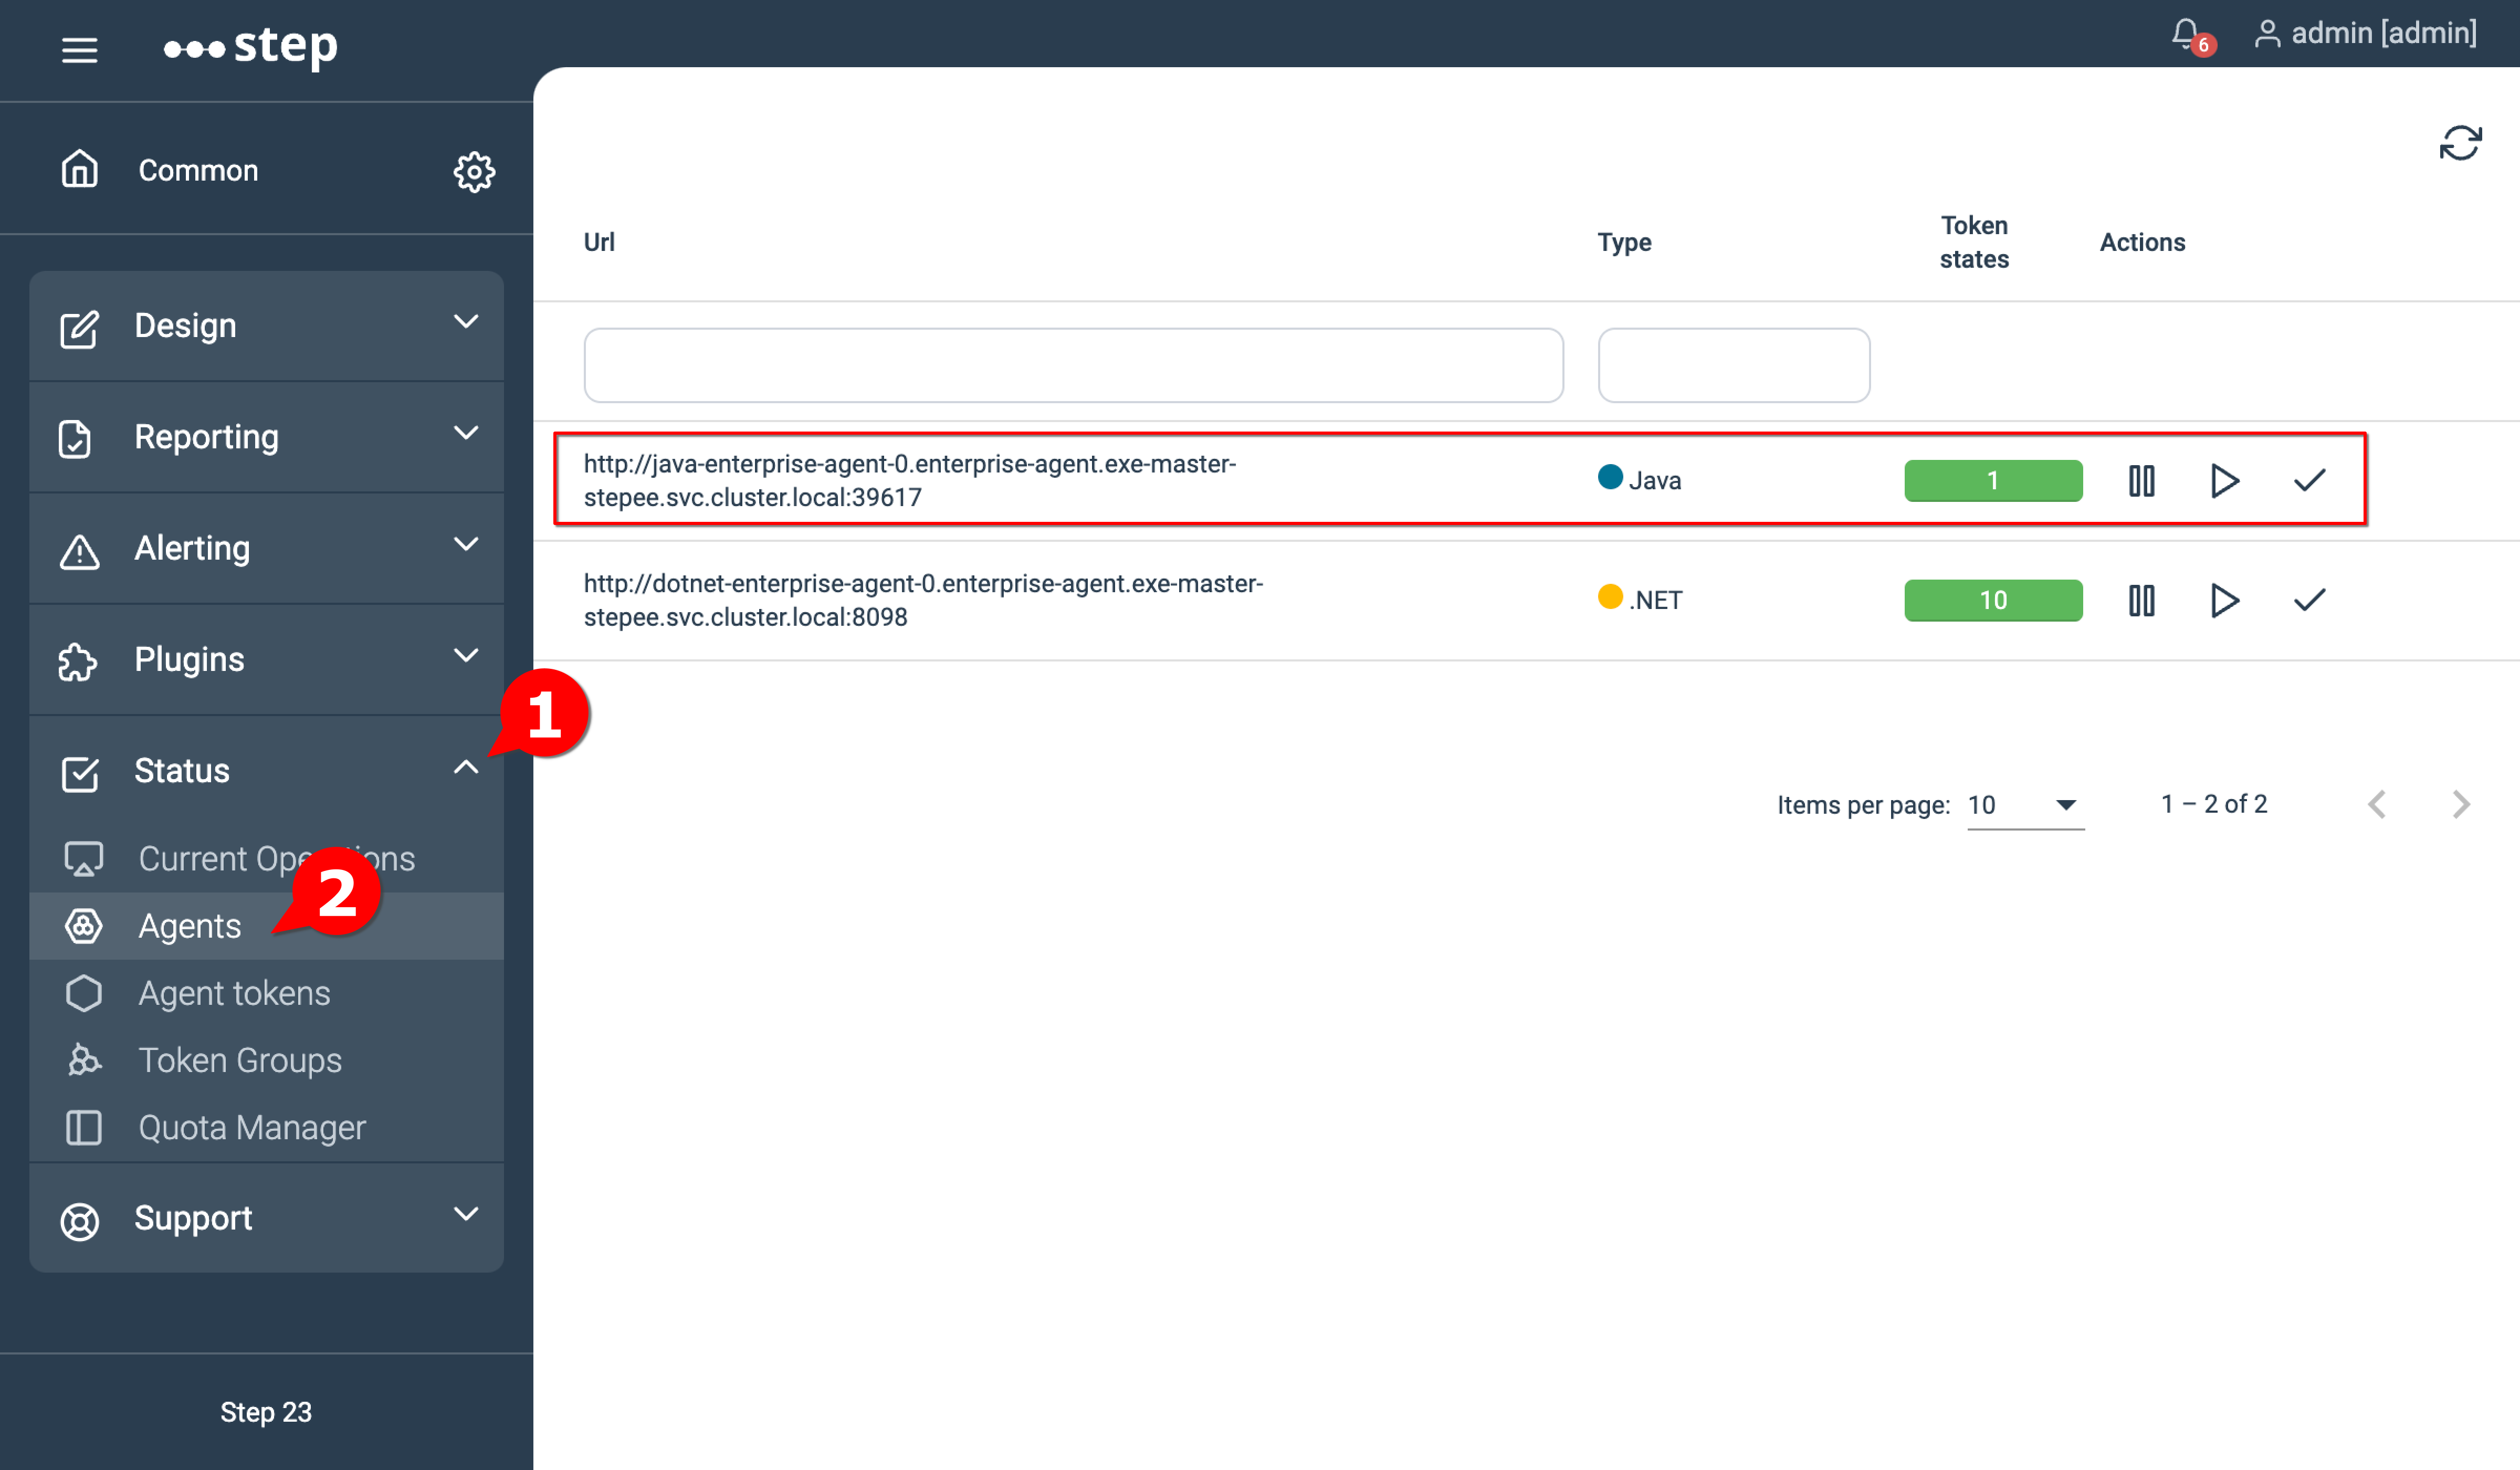
Going to the Controller interface under the “Grid” tab will show you that your agent is now connected and ready to receive requests from the Controller :
Installation as a Service (optional, Windows only)
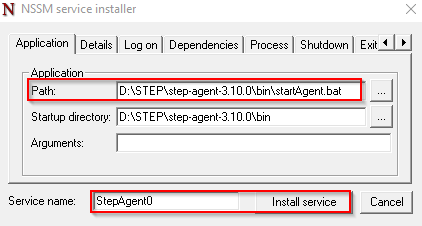
In order to install the agent as a Windows service, follow below steps :
- download nssm at https://nssm.cc/download
- open a new command prompt as Administrator and navigate to the nssm executable location
- execute the following command :
nssm install - nssm gui will open, you can now specify the “startAgent.bat” location and the service name, then click on “Install service” :
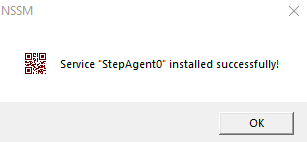
- You should then be prompted that the service installation has been successful :
- you can double-check into Windows service list that the service has been properly installed and then you can start it :

Installation checks
Running process
Depending on your platform, they are various ways to check if the Agent is running :
- Windows: open the Task Manager and look for the Agent processes
- Linux: execute below command and check that a PID is returned :
ps -efl | grep Agent
- Mac OS: open the Activity Monitor and look for the Agent processes
Log file
The Agent log file will be created on first startup under the log folder. (You can change the log file location by editing the bin/logback.xml file). A successful startup should display the following entry into the log file:
2017-09-26 13:22:40,639 INFO [main] o.e.j.s.Server [Server.java:379] Started @1326ms