Housekeeping
Automatic housekeeping
As a Community user, please refer to the manual purge guide.
Main concept
Automatic Houskeeping brings the ability for the controller to automatically delete Executions based on a “Time to live (TTL)” parameter, meaning a default maximum retention period. In addition to simplifying the user’s life, automatic houskeeping ensures that both deleted and remaining entities are handled in a coherent way and that no orphan objects are left behind.
When an execution is deleted, the following associated entities are automatically removed:
- The entry corresponding to the execution in the execution table
- The execution report, including any generated attachments
- The measures associated with the execution
- The plan associated with the execution, only if it is an ephemeral plan originating from an external repository (such as ALM, Jira, etc.). Plans created with the Visual Plan Editor are never deleted automatically.
Since time-series data from executions can be particularly large, there is an additional option to clean up this data at different resolutions individually. For more details, refer to the time-series configuration. Note: this data is also cleaned up when an execution is deleted, so the option only makes sense if the TTL of analytics data is lower than the TTL of executions.
Additionally, a separate housekeeping service is available to cleanup temporary automation packages that are generated internally when an automation package is executed in an isolated context.
Enabling automatic houskeeping
Go to your Admin view and click the Houskeeping entry from the Settings tab. All you have to do is check the “Enable housekeeping” checkbox.
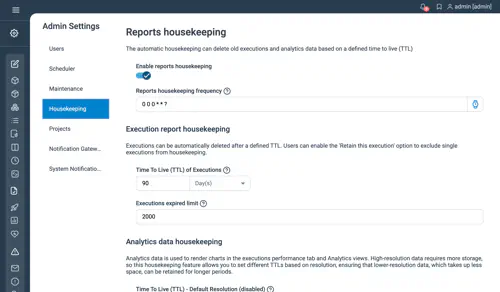
Configuration
Time to live (TTL)
The setting TTL of Executions [s] decides for how many seconds past executions will be kept. For instance, if you execute a plan today and set a value of 86400 as a TTL, the execution will be deleted tomorrow (24 hours later).
Limit of expired execution
With the Executions expired limit you can restrict the max number of executions which can be deleted in single housekeeping run.
CRON Expression for housekeeping scheduler
Automatic Housekeeping relies on a scheduler entry which is as a default configured to run every night at midnight. To change the frequency or time of the housekeeping routine execution you can edit the Housekeeping Frequency property.
Retaining specific executions
Users can mark executions one at a time in order for them to be retained and ignored by the housekeeping job. All you have to do is check the Retain this execution box in the Archiving section of your execution as demonstrated on the following screenshot:
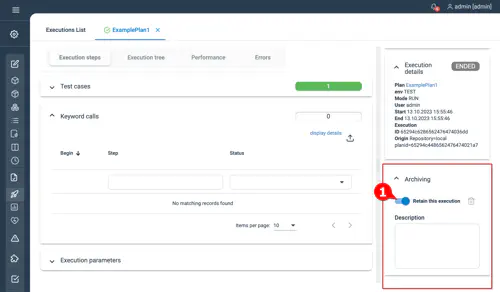
Additional comments can be written in the Description text area.
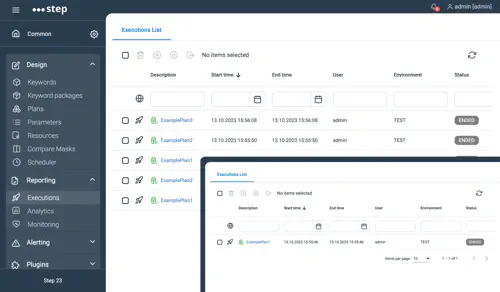
Job execution example
In the following series of screenshot, you’ll see a run in which only one execution had been retained and all others were removed:
Manual Purge
Complete purge
If your database grows too much, and you want to get rid of all the old executions and performance metrics, you can drop the whole database then re-import only your work, which is the fastest way to execute a purge. Follow below steps :
- Warning : make sure to backup your work first !
- Connect to you mongo instance and execute the following :
> use step
switched to db step
> db.dropDatabase();
{ "dropped" : "step", "ok" : 1 }
> exit
Cleanup old executions data
Idea is to perform the below actions:
- export executions data and performance metrics created after a certain point in time (below example is keeping only data created after the first October)
- import the saved execution data and performances metrics while dropping the associated collections, so all older data are removed
Step 1: Retrieve the Timestamp
To begin, you’ll need the timestamp in NumberLong format, which will be used for your database queries. Connect to your database and run the following command to get the timestamp for October 1st:
> NumberLong(ISODate("2017-10-01"))
NumberLong("1506816000000") # This is the result we need
> exit # Exit the database
Step 2: Export the executions data
With the timestamp in hand, export the relevant data by running the following commands:
mongoexport -d step -c executions -q '{"startTime":{"$gt":NumberLong("1506816000000")}}' -o executions_gt_20171001.json
mongoexport -d step -c measurements -q '{"begin":{"$gt":NumberLong("1506816000000")}}' -o measurements_gt_20171001.json
mongoexport -d step -c reports -q '{"executionTime":{"$gt":NumberLong("1506816000000")}}' -o reports_gt_20171001.json

mongoexport -d step -c timeseries -q '{"begin":{"$gt":NumberLong("1506816000000")}}' -o timeseries_gt_20171001.json
mongoexport -d step -c timeseries_day -q '{"begin":{"$gt":NumberLong("1506816000000")}}' -o timeseries_day_gt_20171001.json
mongoexport -d step -c timeseries_hour -q '{"begin":{"$gt":NumberLong("1506816000000")}}' -o timeseries_hour_gt_20171001.json
mongoexport -d step -c timeseries_minute -q '{"begin":{"$gt":NumberLong("1506816000000")}}' -o timeseries_minute_gt_20171001.json
mongoexport -d step -c timeseries_week -q '{"begin":{"$gt":NumberLong("1506816000000")}}' -o timeseries_week_gt_20171001.json

mongoexport -d step -c reportNodeTimeSeries -q '{"begin":{"$gt":NumberLong("1506816000000")}}' -o reportNodeTimeSeries_gt_20171001.json
mongoexport -d step -c reportNodeTimeSeries_day -q '{"begin":{"$gt":NumberLong("1506816000000")}}' -o reportNodeTimeSeries_day_gt_20171001.json
mongoexport -d step -c reportNodeTimeSeries_hour -q '{"begin":{"$gt":NumberLong("1506816000000")}}' -o reportNodeTimeSeries_hour_gt_20171001.json
mongoexport -d step -c reportNodeTimeSeries_minute -q '{"begin":{"$gt":NumberLong("1506816000000")}}' -o reportNodeTimeSeries_minute_gt_20171001.json
mongoexport -d step -c reportNodeTimeSeries_week -q '{"begin":{"$gt":NumberLong("1506816000000")}}' -o reportNodeTimeSeries_week_gt_20171001.json
Step 3: Drop and restore the data
Finally, restore the backed-up data by running the following commands (note that the –drop flag will first delete the collection and its indexes if any)
mongoimport -d step --drop -c executions executions_gt_20171001.json
mongoimport -d step --drop -c measurements measurements_gt_20171001.json
mongoimport -d step --drop -c reports reports_gt_20171001.json

mongoimport -d step --drop -c timeseries timeseries_gt_20171001.json
mongoimport -d step --drop -c timeseries_day timeseries_day_gt_20171001.json
mongoimport -d step --drop -c timeseries_hour timeseries_hour_gt_20171001.json
mongoimport -d step --drop -c timeseries_minute timeseries_minute_gt_20171001.json
mongoimport -d step --drop -c timeseries_week timeseries_week_gt_20171001.json

mongoimport -d step --drop -c reportNodeTimeSeries reportNodeTimeSeries_gt_20171001.json
mongoimport -d step --drop -c reportNodeTimeSeries_day reportNodeTimeSeries_day_gt_20171001.json
mongoimport -d step --drop -c reportNodeTimeSeries_hour reportNodeTimeSeries_hour_gt_20171001.json
mongoimport -d step --drop -c reportNodeTimeSeries_minute reportNodeTimeSeries_minute_gt_20171001.json
mongoimport -d step --drop -c reportNodeTimeSeries_week reportNodeTimeSeries_week_gt_20171001.json
Note: Depending on your requirements, you can choose to restore only the performance metrics or the functional results. Refer to the following table to determine which collections to restore based on your goal:
| Collections | Functional results | Performance metrics |
|---|---|---|
| reports | mandatory | mandatory |
| reports | mandatory 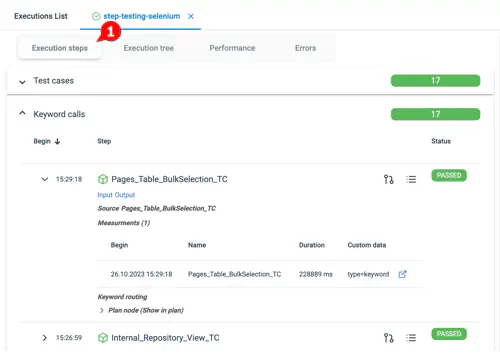
|
not mandatory |
| measurements | not mandatory | mandatory 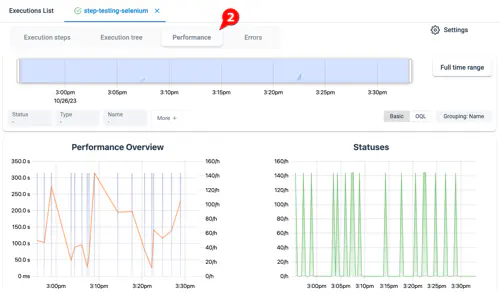
|