Quick setup
The goal of this guide is to get your first Step cluster running in minutes. After this you can follow our additional tutorials to learn how to create and deploy your first distributed automation scripts (called “Keywords”) on this freshly created cluster.
Step SaaS and Step on-prem
Step is available in different versions as described in Step pricing. Since we already prepared everything for you in the full-serviced SaaS solution, the easiest way to start using Step is to follow the Getting started with Step SaaS. If you however want to host your own instance of Step, follow the quickstart tutorial on this page.
Getting started with Step on-prem
Download Step on-prem
Step needs at least the following three components to operate: a MongoDB instance, a controller instance (orchestrator) and an agent (worker). In this Quick Setup, both the controller and agent will require a Java 11 Runtime Environment (JRE) or Java Development Kit (JDK).
-
If Java is not installed on your device, download JDK 11 from Oracle’s website. Alternatively, you can also use the Zulu SDK, the recommended version is version 11.
-
Download the latest Community MongoDB Server instance from [the official website] (https://www.mongodb.com/download-center/community). Quick download link: 4.0.9
-
Download the agent and controller archives from our github release page.
Install Step on-prem
- Unzip both Step archives. There should be a controller folder and an agent folder.
- If you’ve downloaded a JDK in a zip format, unzip it somewhere in the folder of your choice. If you’ve downloaded the exe version, run through the wizard using the default settings. Set the path to the JDK’s home into the start scripts of the controller (step-controller-x.y.z/bin/startController.bat) and agent (step-agent-x.y.z/bin/startAgent.bat). Both have JAVA_PATH variable which can be set according to the example commented in the script file itself.
- Run through the default steps of MongoDB’s installation wizard, using the default port (27001).
- For more details regarding installation and configuration see: Database installation, Controller installation, Agent installation
Run Step on-prem
- Start a basic MongoDB instance from the controller’s folder by using our convenience script (step-controller-x.y.z/bin/startMongo.bat)
- Make sure that no existing program is already running on ports 8080 and 8081 which will be respectively used by Step for web traffic and grid communication.
- Start the controller script (startController.bat), check the console’s output, make sure it ends up in RUNNING state and that no fatal error or exception occurred. You should be seeing something like this:
Started o.e.j.s.ServletContextHandler@c6bf8d9{/rest,null,AVAILABLE}
Started o.e.j.s.h.ContextHandler@44392e64{/,null,AVAILABLE}
Started o.e.j.s.ServletContextHandler@e18d2a2{/files,null,AVAILABLE}
Started ServerConnector@7aedcf87{HTTP/1.1,[http/1.1]}{0.0.0.0:8080}
Started @55602ms- Start the agent script. If started successfully, the agent will just print out a couple of warnings and outputs, such as follows:
WARNING: The following warnings have been detected: HINT: A HTTP GET method, public void step.grid.agent.AgentServices.reserveToken(java.lang.String) throws step.grid.agent.tokenpool.AgentTokenPool$InvalidTokenIdException, returns a void type. It can be intentional and perfectly fine, but it is a little uncommon that GET method returns always "204 No Content".
HINT: A HTTP GET method, public void step.grid.agent.AgentServices.releaseToken(java.lang.String) throws step.grid.agent.tokenpool.AgentTokenPool$InvalidTokenIdException, returns a void type. It can be intentional and perfectly fine, but it is a little uncommon that GET method returns always "204 No Content".
Validating your setup
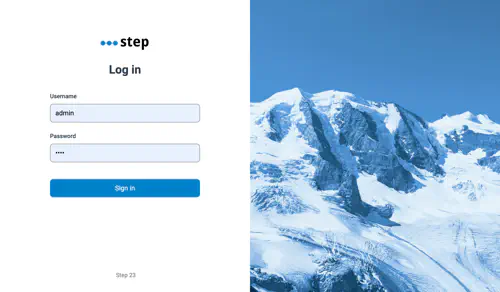
Step’s web application should now be running at the following address http://localhost:8080. You can log in immediately as an admin using the following default credentials for Step Enterprise:
user: admin
password: init
Note: For Step OS no password is required

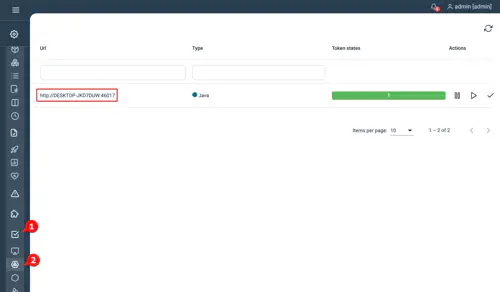
If you can log into the application, your installation is most likely successfully. Let’s just make sure that your agent has registered successfully against the controller by taking a look at the Grid’s current state. Just click on the Grid tab in the upper menu. It should take you to a page listing the currently connected agents, which looks like this:

The entry at the bottom displays a http url, and a green monitoring bar (in the example with the number 10) indicating that your agent has successfully connected and is ready to receive a workload.